TABLE OF CONTENTS
- Spare Part:
- Video Guide:
- Troubleshooting:
- Written Guide:
- 1. Remove the extruder
- 2. Remove the three cables.
- 3. Unscrew the three screws fixing the extruder assembly.
- 4. Take out the extruder.
- 5. Extruder Tear down
- 6. Restore the extruder (optional)
- 7. Install the motor and tighten the two screws.
- 8. Remove the cutter push rod and put it back into the extruder.
- 9. Tighten the three screws in sequence.
- 10. Plug in the cable and pay attention to the wiring on both sides.
Spare Part:
Spare Part Referenced:
Creality Hi Extrusion Kit Buy Here from us in Australia (DREMC).
We highly recommend you print below protector to increase the life the connector and will allow you still use extruder even if the teeth of the connector fails.
https://www.printables.com/model/1253678-improved-k2-extruder-ptfe-tube-clip
https://www.printables.com/model/1229085-creality-k2-plus-bowden-tube-protector
Video Guide:
Attention: Heavy-Duty Yellow Adhesive: The connectors on the extruder are bonded with a powerful yellow adhesive. To detach them, you may need to carefully cut or gently wiggle the connectors. Avoid applying excessive force, as this could damage both the extruder board and the cable. Additionally, using some isopropyl alcohol may help to weaken the adhesive.
Tool Required:
- 2mm Hex Driver or Hex Key
- 2.5mm Hex Driver or Hex Key
- Precision Tweezers (for easier connector removal)
- Isopropyl alcohol (to soften hot glue connections)
Troubleshooting:
https://wiki.creality.com/en/cr-series/creality-hi/extruder-kit
Written Guide:
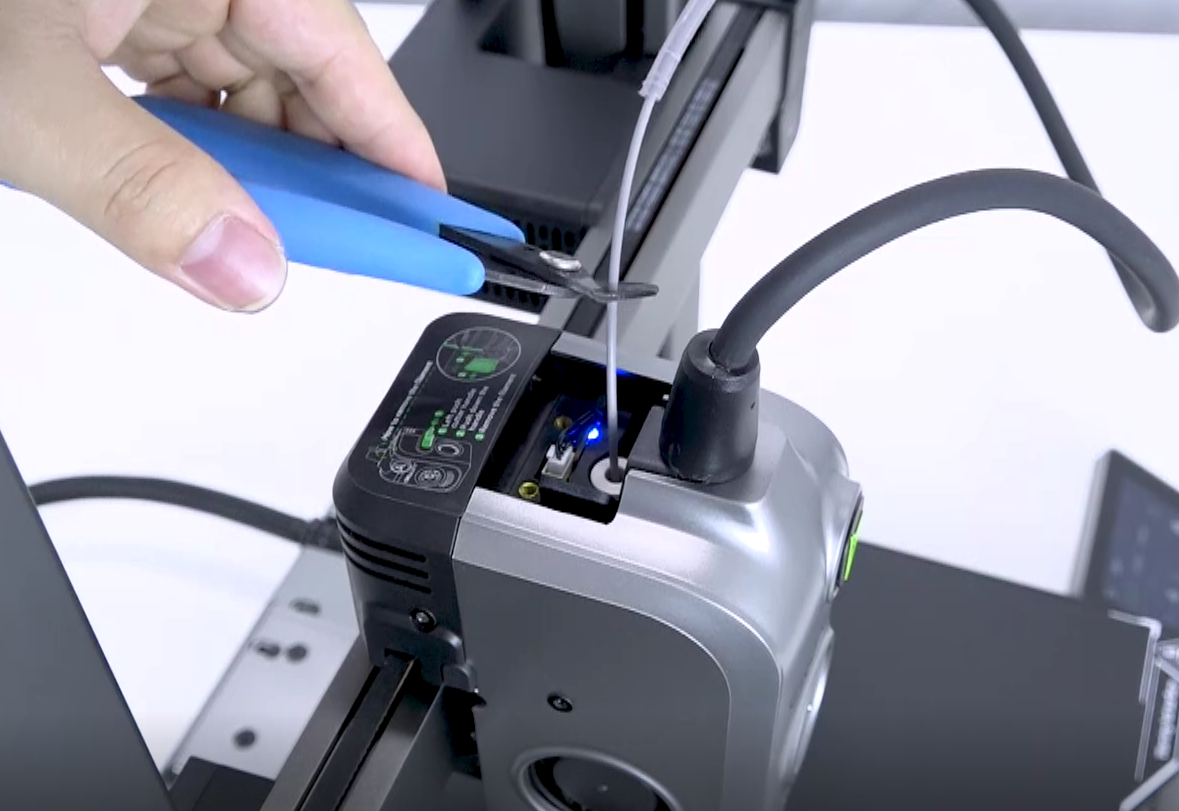
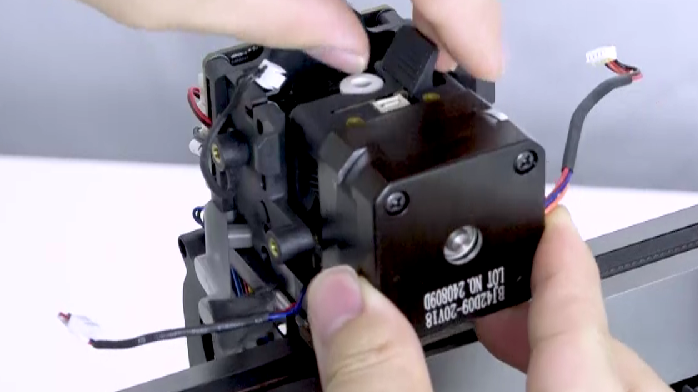
1. Remove the extruder
Press the pneumatic connector to pull out the Teflon tube (PTFE tube), pull the extruder to the unlock state, and then cut the filament.
Use a hex key to remove the four screws on the nozzle cover, and remove the nozzle cover and motor protection cover.
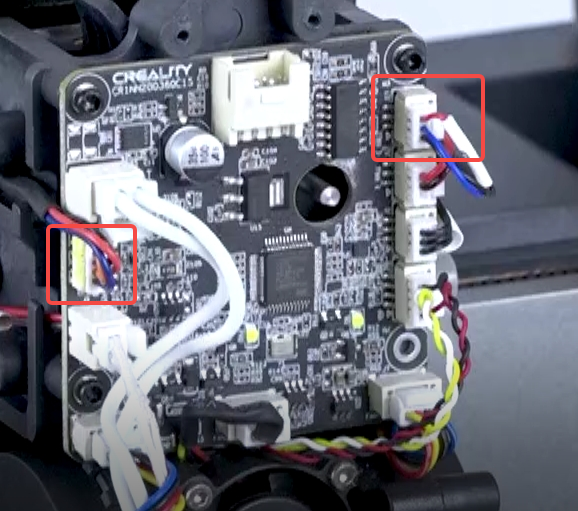
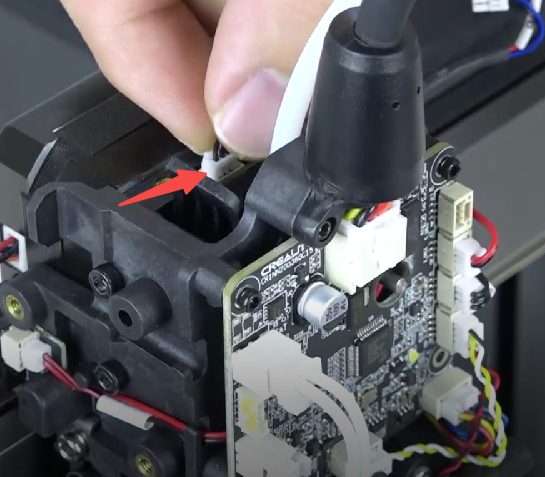
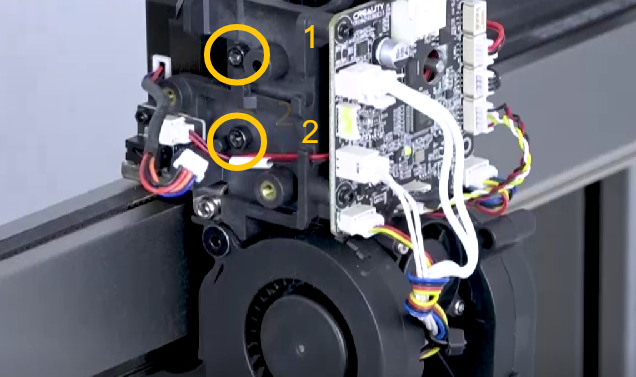
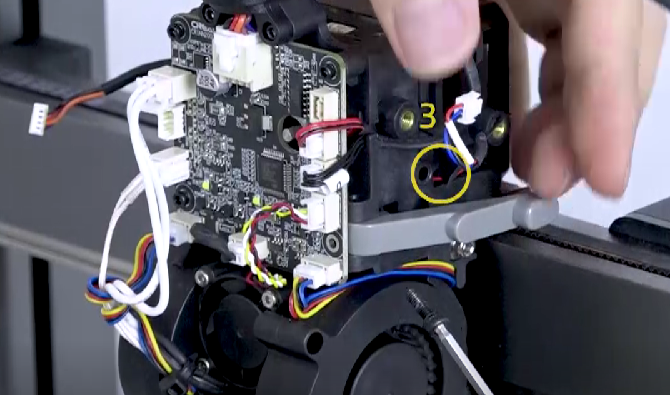
2. Remove the three cables.
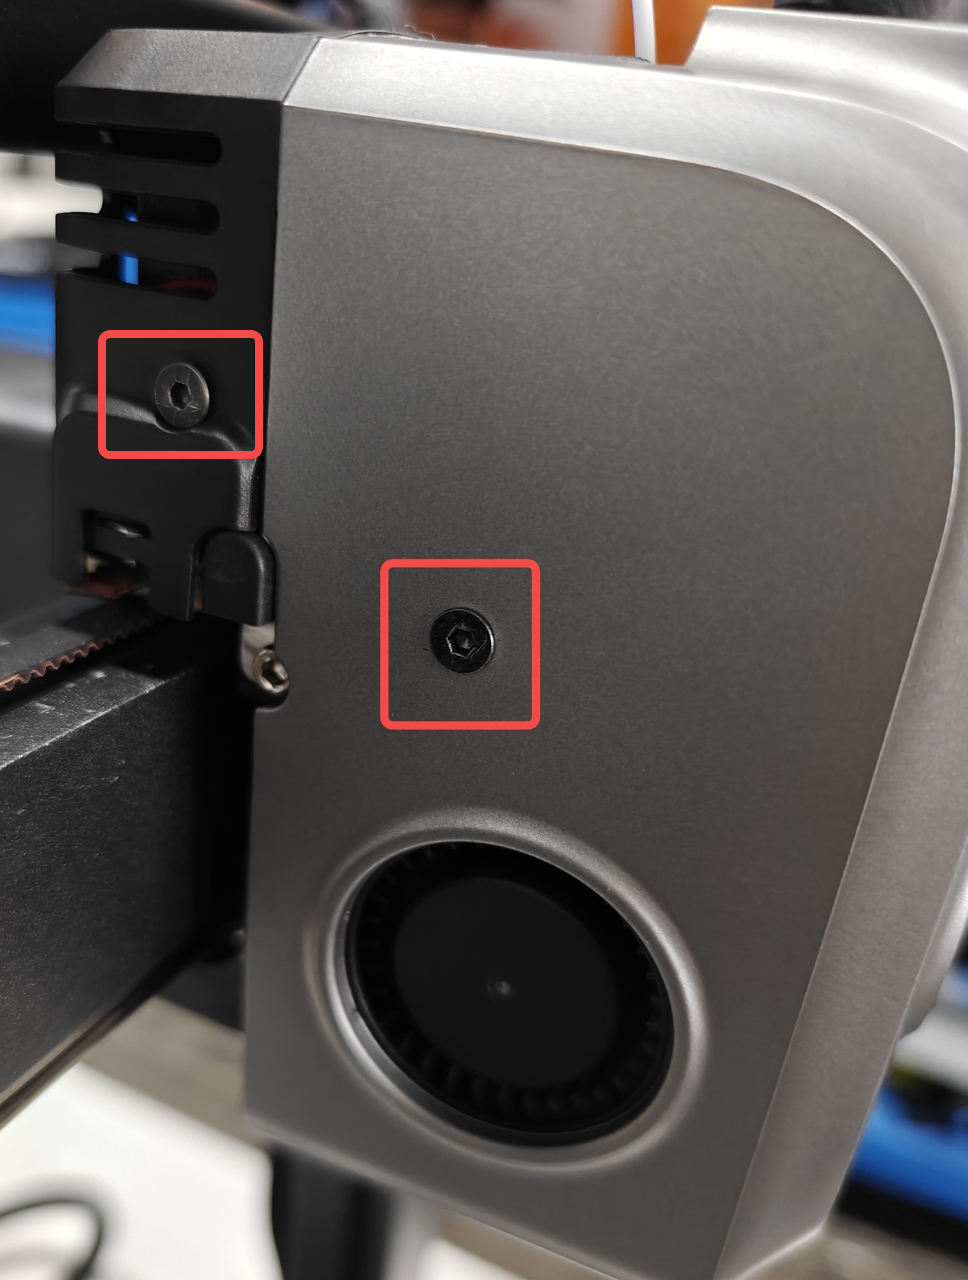
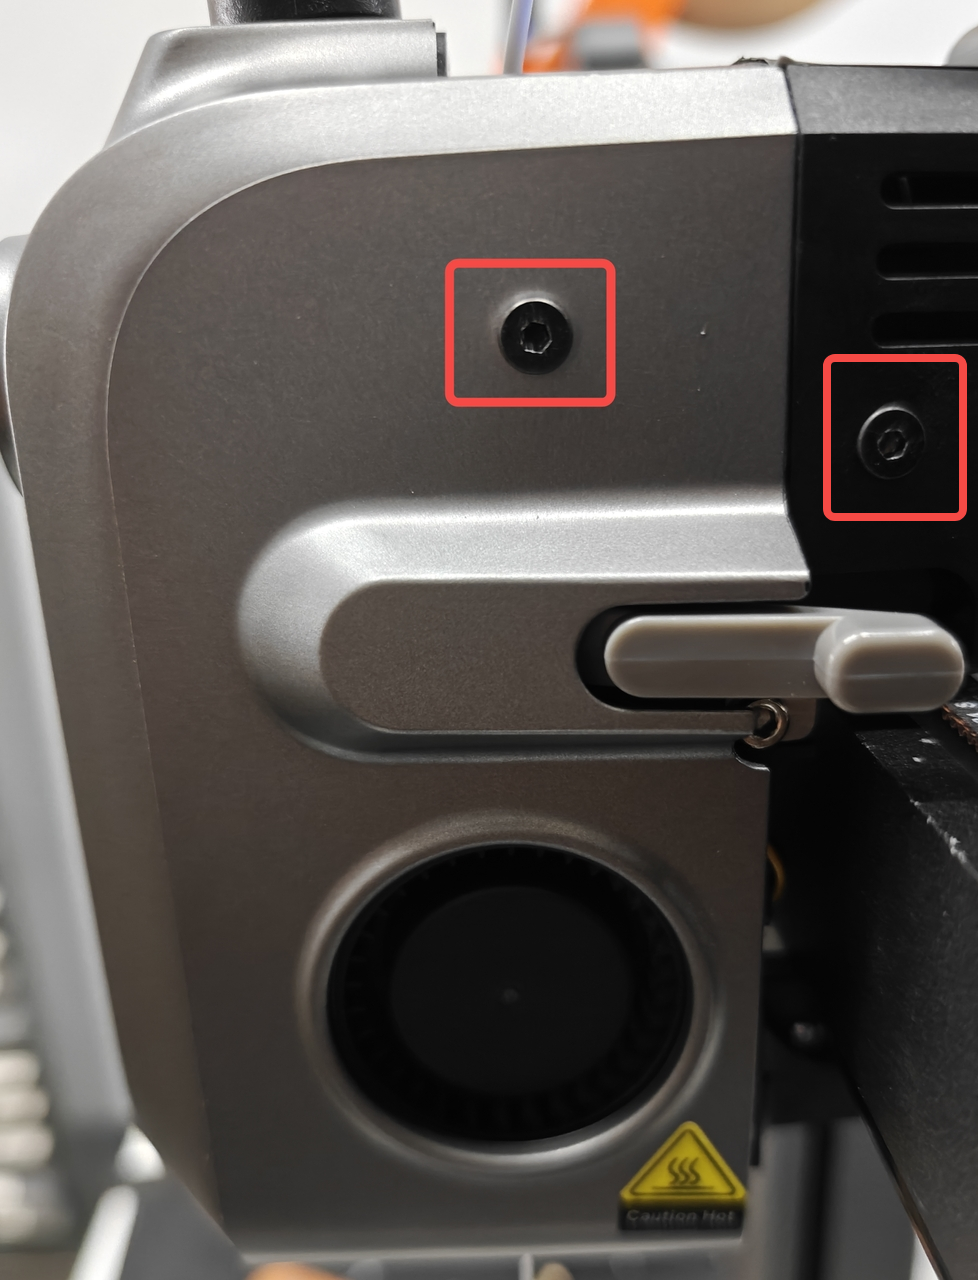
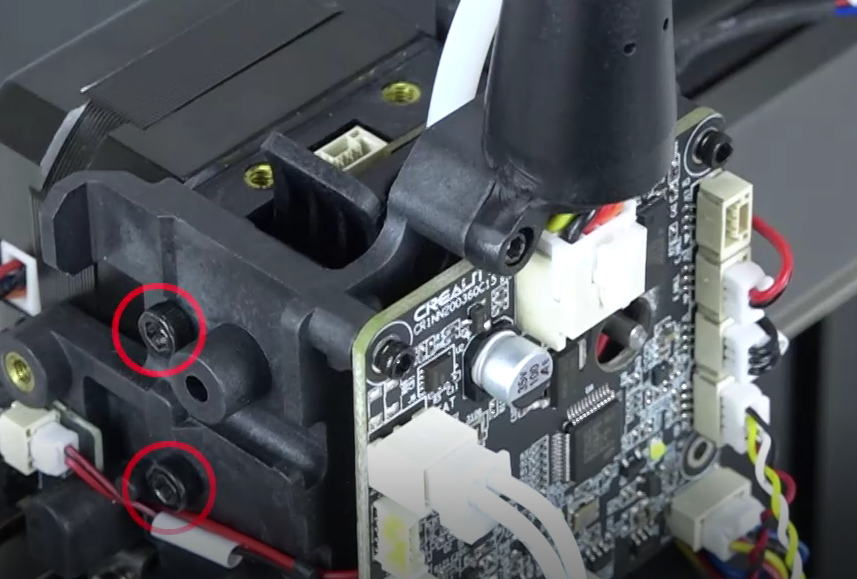
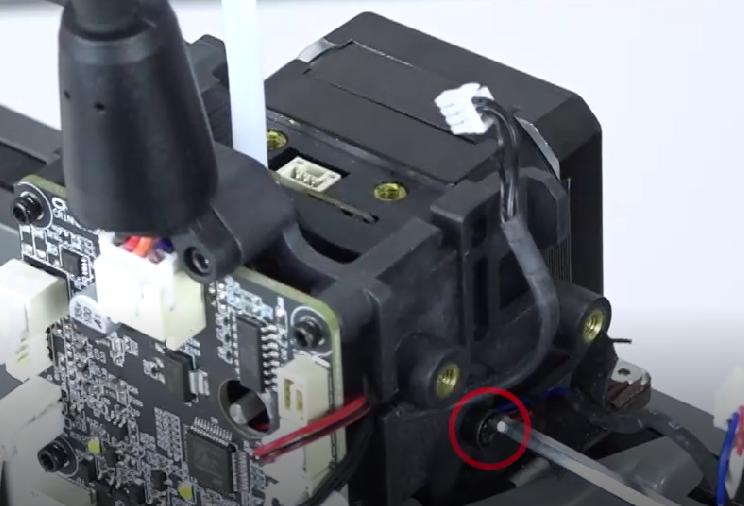
3. Unscrew the three screws fixing the extruder assembly.
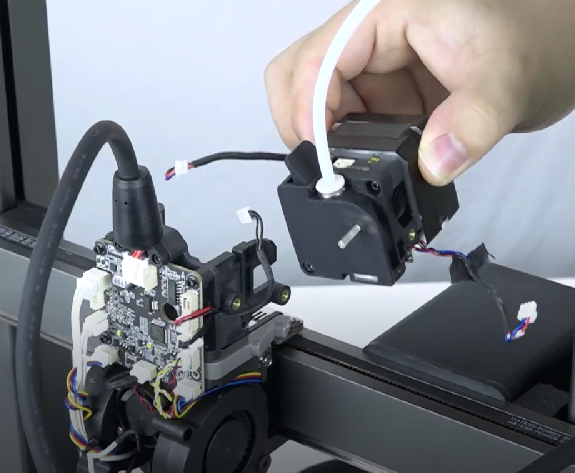
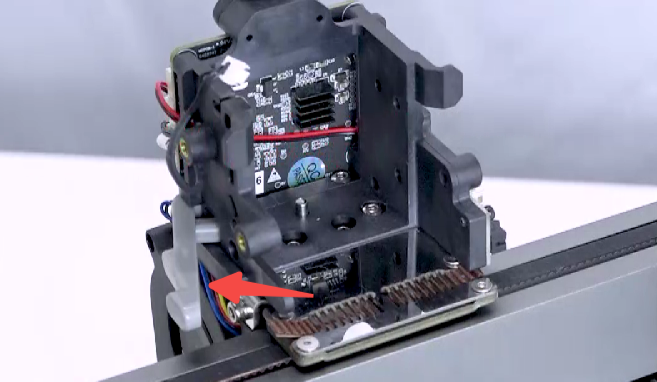
4. Take out the extruder.
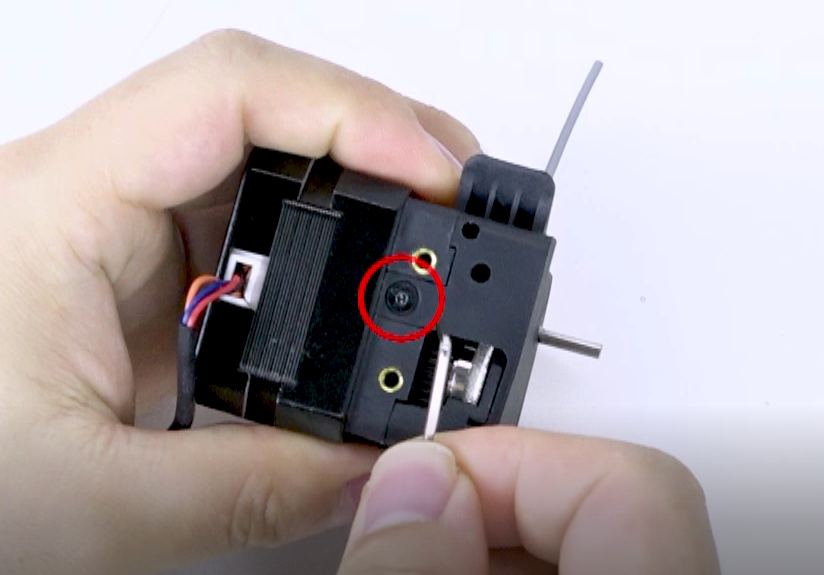
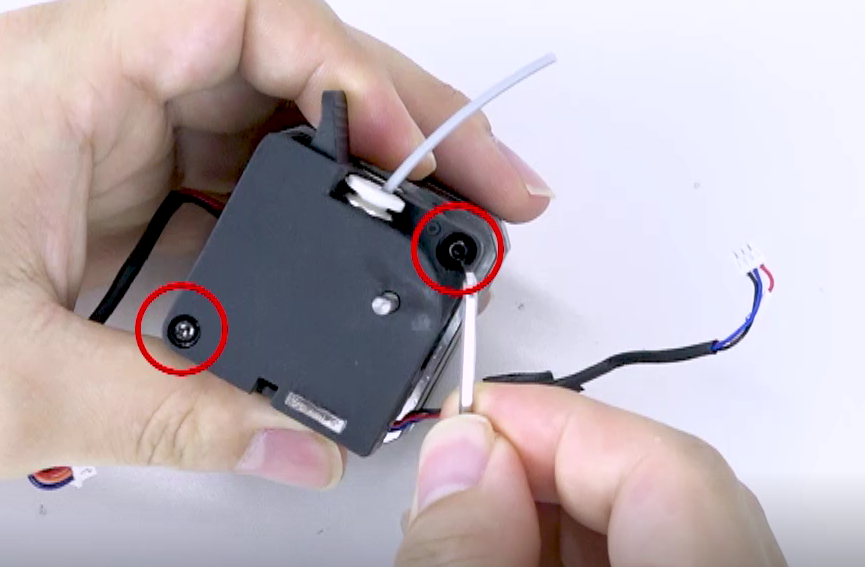
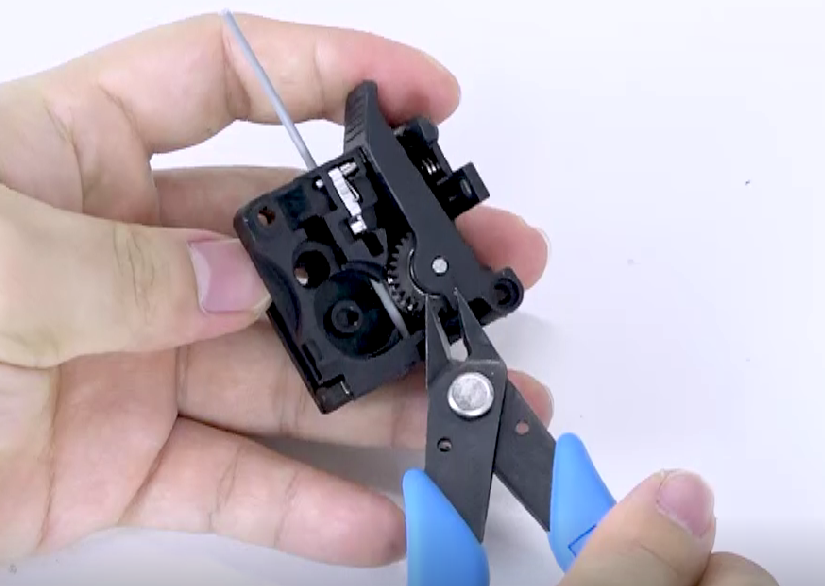
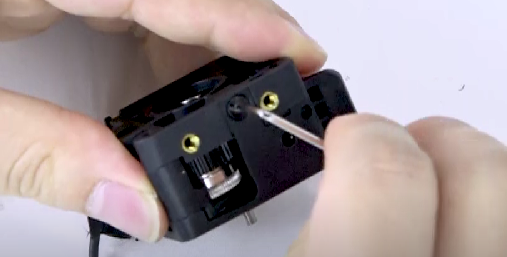
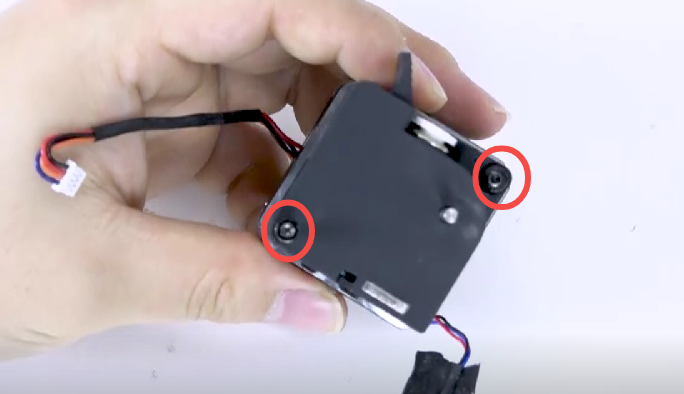
5. Extruder Tear down
Unscrew 3 screws and remove the extruder motor.
Hold the extruder wrench, disassemble the extruder, and check the internal clogged filament.

Use cutting pliers to cut the middle part of the clogged filament and remove it from both sides.
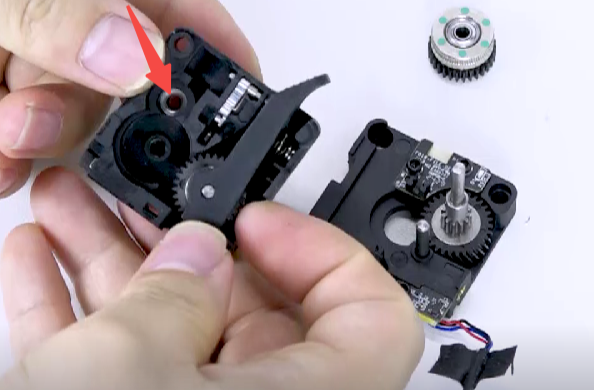
6. Restore the extruder (optional)
Install the gear.
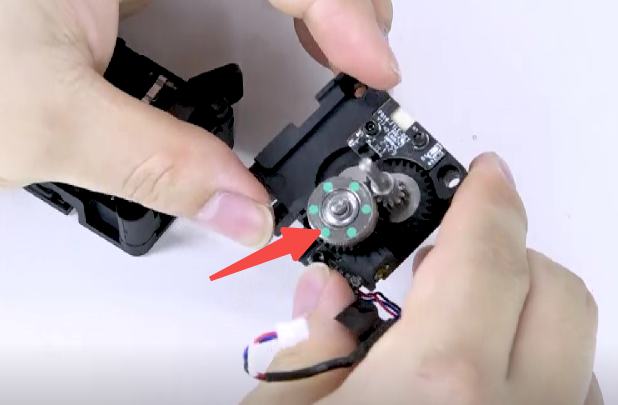
Install the extrusion clamp and tighten the screws.
7. Install the motor and tighten the two screws.
8. Remove the cutter push rod and put it back into the extruder.
Check whether the cutter push rod can spring back normally.
9. Tighten the three screws in sequence.
10. Plug in the cable and pay attention to the wiring on both sides.
Finally, install the hotend cover and the motor protection cover.
Was this article helpful?
That’s Great!
Thank you for your feedback
Sorry! We couldn't be helpful
Thank you for your feedback
Feedback sent
We appreciate your effort and will try to fix the article